
티스토리 뷰
1. 구글 플레이 그라운드 열기.
1-1. https://developers.google.com/oauthplayground/
OAuth 2.0 Playground
Request Body Manual entry Enter the data that will be added to the body of the request: File You may choose to send a file as part of the request. When both a file and manual content are provided both will be sent using a multipart request. You may send fi
developers.google.com
1-2. Firebase Cloud Messaging API v1
/ https://www.googleapis.com/auth/cloud-platform 클릭

1-3. 계정 선택 로그인 후 허용 클릭.
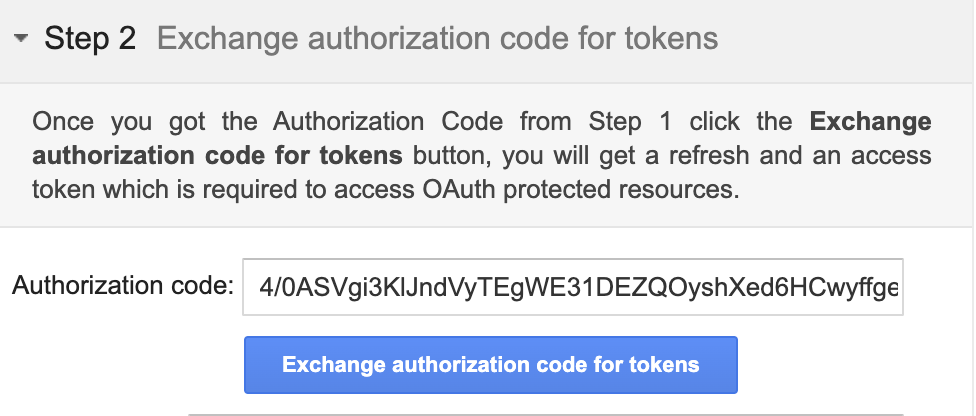
- 아래 처럼 화면이 바뀌어야 합니다. - Exchange authorization code for tokens 클릭
- 아래의 화면 처럼 나와야 합니다.
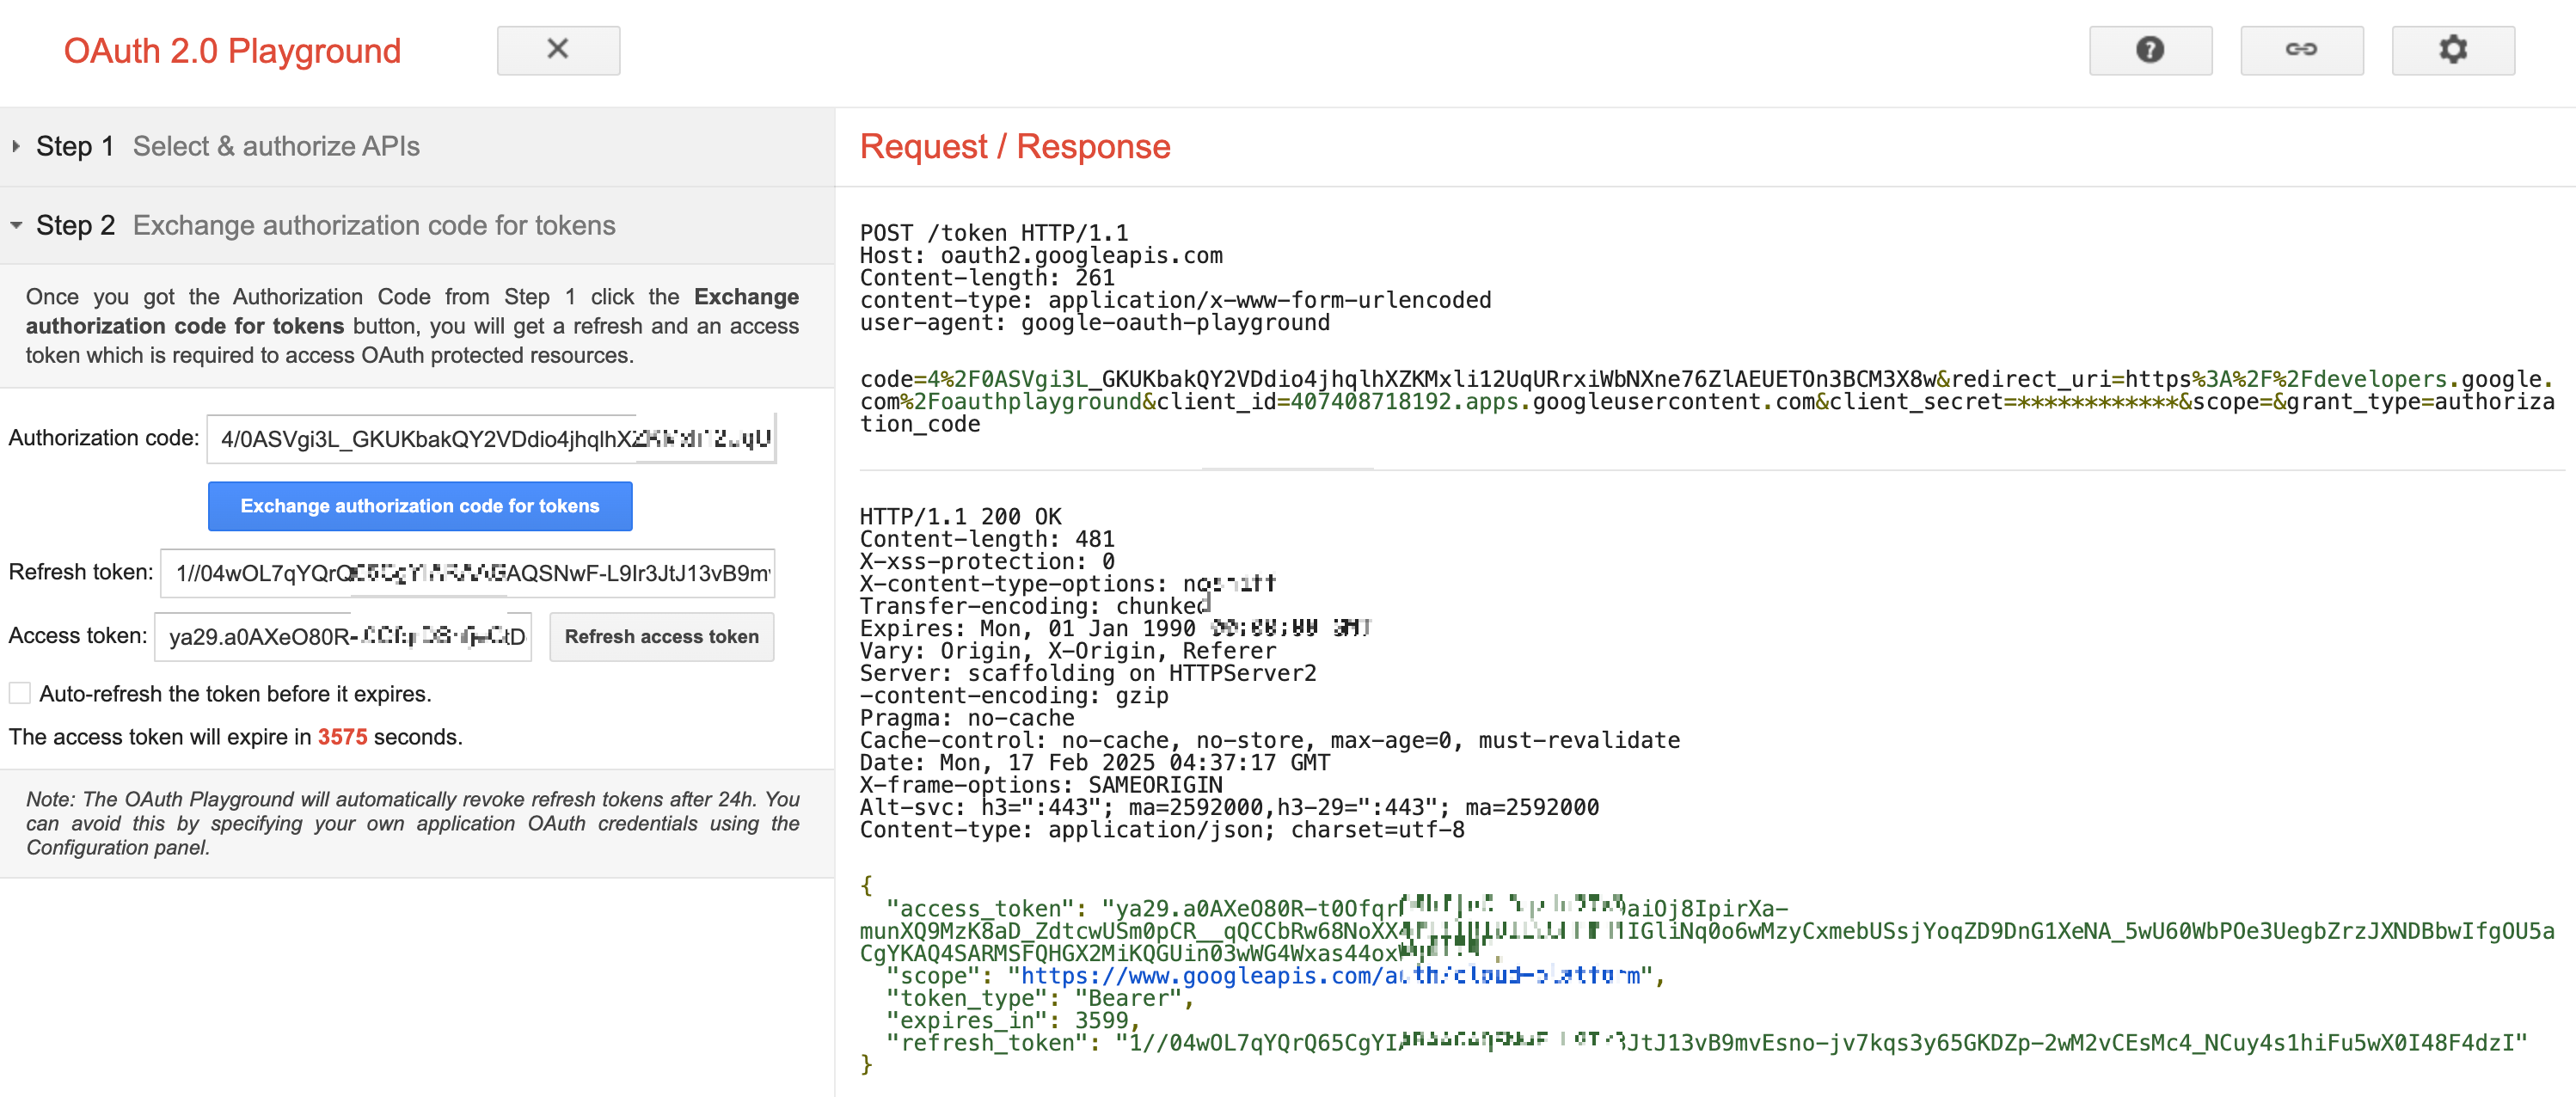
1-4. access_token 복사

2. Post Man 열기
1-1. Request URI 변경
HTTP Method : POST
Request URI : fcm.googleapis.com/v1/projects/<프로젝트 ID>/messages:send
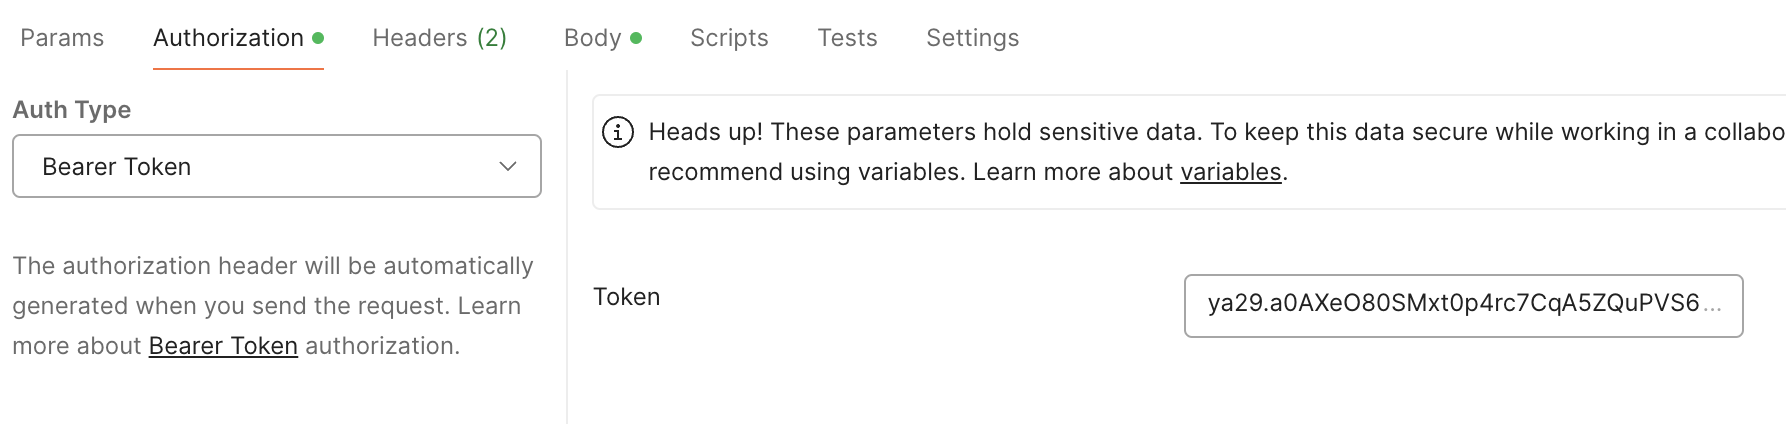
1-2. Authorization / Auth Type : Bearer Token / 복사한 access_token 붙여넣기
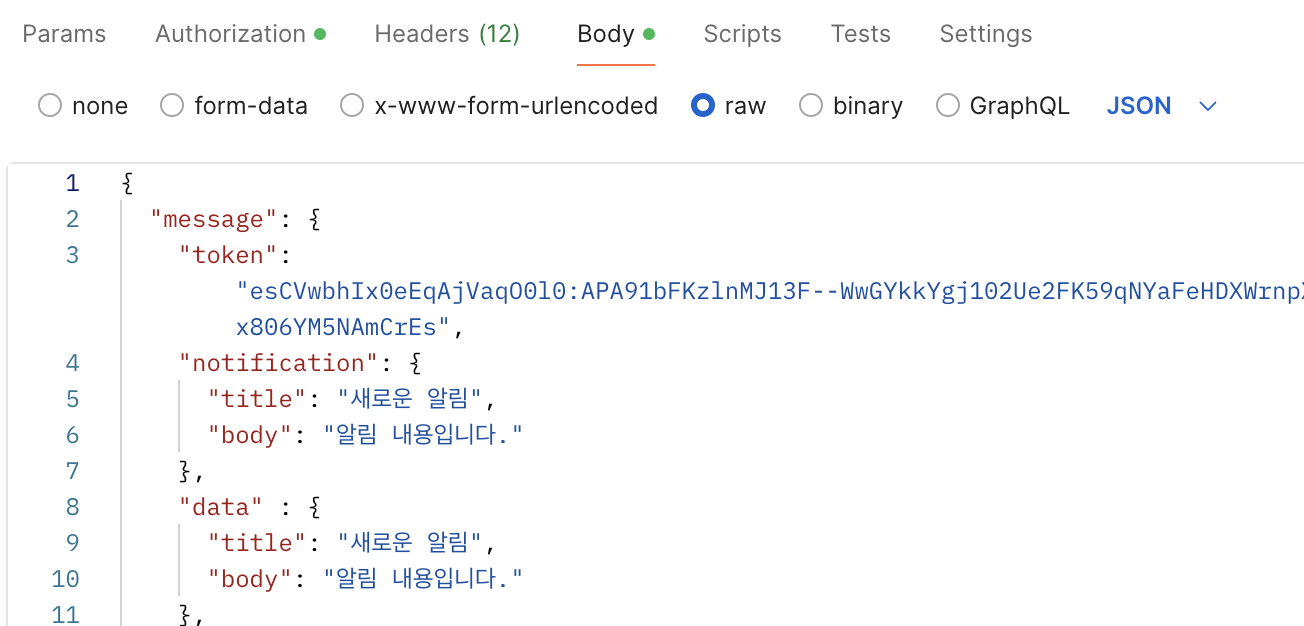
1-3. Body / raw / Firebase 양식에 맞게 데이터 작성
테스트 해보시길 바랍니다.
'기타' 카테고리의 다른 글
| 티스토리 코드블럭 줄 바뀜 및 코드 정렬 문제 해결 법! (0) | 2025.02.14 |
|---|---|
| [Github] 소스트리 gitignore 안될 때. (1) | 2024.12.18 |
| [Android Studio] Retrofit2 Body에 null value 보내기 (0) | 2023.09.11 |
| [Android Studio] command not found: adb 에러 (0) | 2022.08.16 |
| Github Token 방식으로 로그인하기 (0) | 2022.05.03 |
- Total
- Today
- Yesterday
- API
- error
- android
- ios
- ScrollView
- 알고리즘
- FCM
- node.js
- ec2
- message
- Token
- java
- ExoPlayer
- app bundle
- Kotlin
- https
- listener
- 재귀함수
- Hilt
- Crop
- bitmap
- retrofit
- Custom
- Flutter
- GitHub
- flutter_new_badger
- 코딩테스트
- Android Studio
- direction
- Firebase
| 일 | 월 | 화 | 수 | 목 | 금 | 토 |
|---|---|---|---|---|---|---|
| 1 | ||||||
| 2 | 3 | 4 | 5 | 6 | 7 | 8 |
| 9 | 10 | 11 | 12 | 13 | 14 | 15 |
| 16 | 17 | 18 | 19 | 20 | 21 | 22 |
| 23 | 24 | 25 | 26 | 27 | 28 | 29 |
| 30 |